Sew a Softie - Frederick and Eloise
It’s time to...Sew a Softie for the Festive Season! You can find out more about Sew a Softie here. And be sure to check out all of the other Sew a Softie tutorials.
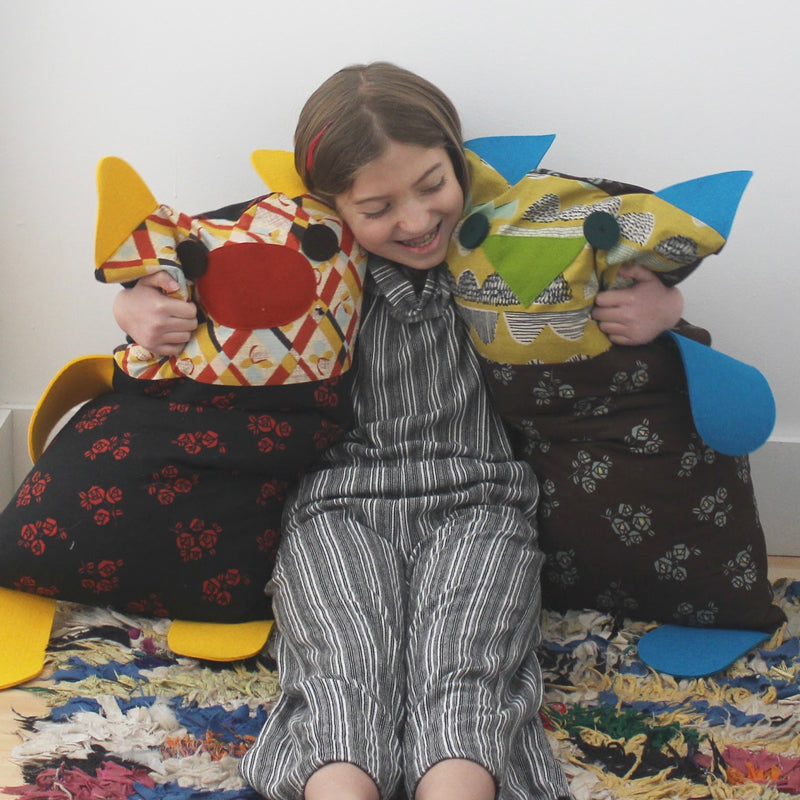
If you are familiar with my previous Sew a Softie projects, you may be thinking that I will once again channel my inner Claes Oldenberg and make another super size everyday object. You can find my Giant Ice Cream Cone here, Giant Pencil Pillow here and Piece of Paper Quilt here. I did consider a variety of possibilities, but in the end I decided on Frederick and Eloise. These guys are all about texture and are as comfortable on the couch and on a bed as they are playing with other softies. And of course, I still have my favorite 9 year old as my Sew a Softie model!


For the fabric, you can use quilting cotton, but I suggest you try something just a bit heavier for durability such as upholstery weight cotton, cotton poplin, cotton twill, linen, or barkcloth.
In this project I used 3mm felt for all of the appendages. This heavy-weight felt is soft, sturdy, and requires no sewing and turning or stuffing. You can find it here and here as well as other places online.
Barcelona is one of my favorite places. A major highlight of my time there in 2012 was the discovery of Casa De Felthu. House of Felt, folks! Seriously! A hole in the wall shop complete with little old man who only spoke Catalan. What could be better?! Besides the 1mm felt that we are familiar with, they also had 3mm felt and even thicker. This was a revelation. I had never seen this before except in industry. Of course it was vital that I buy a bunch, and I am continuing to use that felt for projects even after 5 years. Now, you can find 3mm felt and even 5mm felt here in the US.
For the eyes I used felt buttons, which can be found here.
The measurements for this project are based on a 16” x 26” pillow insert from Ikea. I especially like the ones with feathers because they don’t get all flat after a while. Just fluff them up and they are good to go. If you don’t have the same size insert all you need to do is adjust the measurements when cutting your fabric.

Materials and Tools
• ⅜ yard of Fabric A for the face
• 1 yard of Fabric B for the body
• 18” x 18” piece (or three 9” x 9” pieces) of 3 mm Wool Felt for the appendages (If you prefer to use 1mm felt, you can cut double the amount, layer two pieces, and sew them together close to the edge to make them sturdier.)
• 4” x 6” piece of 1 mm Wool Felt for the nose
• 16” x 26” Pillow insert
• 2 felt buttons, 1 ⅝” diameter (you can use regular buttons, but felt buttons are softer)
• Thread
• Basic sewing tools including sewing machine
• Compass and chalk pencil (optional)
Cutting
1. From Fabric A cut one piece 9 ½” x 16 ½”
2. From Fabric B cut two pieces 16 ½” x 17 ½”. Cut one piece 13 ½” x 16 ½”.

3. From 3 mm felt, cut four pieces 4” x 7”. Cut two pieces 4” x 4 ½”. To shape the curve, hand draw the curve on one short end of each 4” x 7” piece, or use a compass. Open the compass to 2” and use it to draw the curve. Cut the curve on all four of the 4” x 7” pieces. To cut the ears, curve then as you did on the appendages, or cut them into triangles.


4. From 1 mm felt, cut the nose. There is no pattern for this. Just cut a triangle, oval, circle, or whatever. Try different shapes and sizes by cutting shapes from paper until you find one that you like. Use that paper as a pattern to cut the felt.
Sewing
1. First, sew the front together. Place the Fabric A (9 ½” x 16 ½”) piece and one of the Fabric B 16 ½” x 17 ½” pieces together, right sides together, matching a 16 ½” side on each. Sew the 16 ½” side with a ½” seam allowance. If desired, also use a zig zag stitch along the raw edge for durability.
2. Add the face. Position the nose as desired and topstitch either by machine or by hand. Hand sew on the button eyes with strong thread or floss.

3. Place the appendages along the edge of the front piece, matching the short, straight ends of the appendages with the raw edges of the front fabric. Place two appendages along the bottom edge as the legs. Place one appendage on each of the two long sides as the arms. Place the two ears along the top edge of the face. All of the appendages and ears will be facing into the front piece, laying flat against the front fabric. Sew ⅛’ from the edge on each appendage and ear to hold them in place.


4. Now, hem the back pieces to make the opening for the pillow form. On one 16 ½” edge of the Fabric B 13 ½” x 16 ½” piece, and one 16 ½” edge of the remaining Fabric B 16 ½” x 17 ½” piece, fold the edge up ½” and then ½” again to enclose the raw edge. Sew along the first fold, just inside the fold, to create a hem on one 16 ½” edge of each piece.

5. Place the front right side up in front of you. Place the 2 back pieces, right side down, on top of the front, matching the raw edges and having the hemmed edges overlapping in the middle. All of the appendages should be inside the sandwich. Pin all the way around the four sides. Sew around the entire rectangle with a ½” seam allowance. (This will make the pillow slightly smaller than the size of the pillow form but it will make the pillow fuller.) If desired, also use a zig zag stitch along the raw edge for durability.


Finishing
1. Turn the pillow right side out through the opening in the back.
2. Insert the pillow form into the pillow.

3. Fluff.