Sew a Softie - Giant Ice Cream Cone

Welcome to Sew a Softie Day at Fish Museum and Circus! Sew a Softie Day?! How could I resist getting involved?
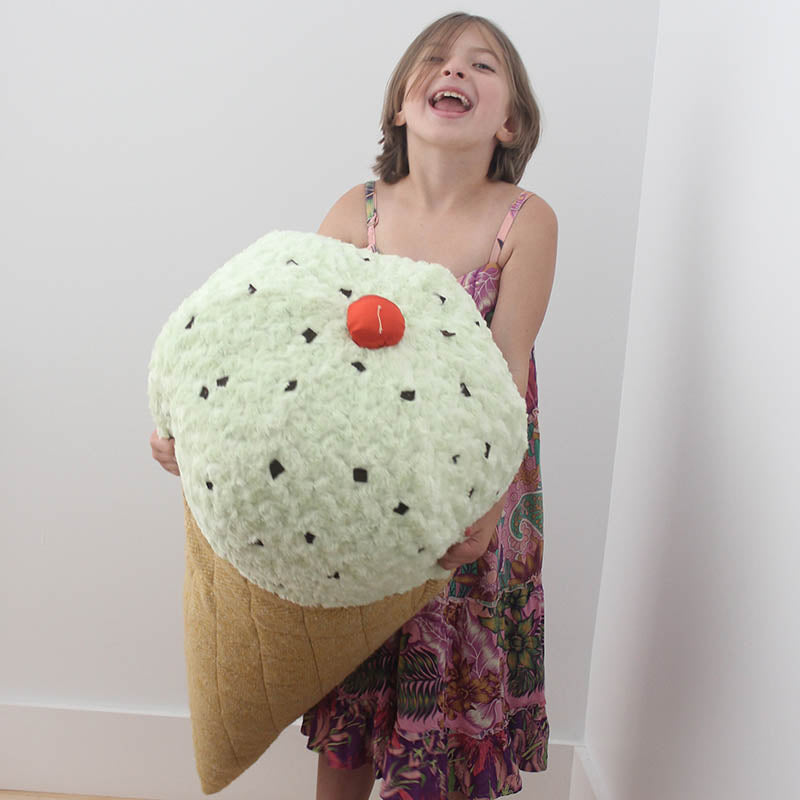
I learned to sew by making dolls, and have made and designed many doll and animal patterns since then. It is summer here in New York and summer is all about ice cream. So I designed a giant ice cream cone pillow! Great for playing with or just lounging around on! Apparently I don't follow directions well since this was supposed to be a hand sewn softie, but I hope you forgive me. I recruited my favorite 8 year old to show you all the fun to be had:

Softies are great for using different textures and materials. For the cone, I discovered that the reverse side of textured wool was just right. For the ice cream I used plush fabric in a pale green for my childhood favorite-mint chocolate chip with wool felt chips. A shiny satin cherry sits on top just for fun.


So here we go...
How to Make a Giant Ice Cream Cone
Finished size: 40” x 18” x 18”
Materials:
30” x 30” fabric for cone (something textured is nice such as wool, felted wool, or linen)
30” x 30” batting for cone
30” x 30” muslin or other thin cotton fabric for cone lining
⅞ yard fabric for ice cream (plush, fleece or something similarly soft and squooshy)
Scraps of brown felt for chocolate chips
Brown perle cotton or embroidery floss for attaching chocolate chips
7” x 7” fabric for cherry (satin or cotton)
6” heavy thread, floss, or waxed linen for cherry stem
Thread
Fiber fill, beanbag filling, or shredded foam
Cone angle pattern, ice cream pattern part 1 and part 2, and cherry pattern provided
Paper for extending cone pattern
Walking foot for your sewing machine (optional)
Instructions:
1. First, complete the pattern for the cone. Print out the cone angle provided. Add extra paper as needed. From the point of the angle, measure straight out on both sides for 30” and draw each side. To draw the curve between the two sides for the cone shape, measure 30” from the point to seven or eight spots between the two sides. Draw the curve from one side, connecting each spot, to the other side.
2. Using this cone pattern, cut one cone from cone fabric, one from batting, and one from cone lining.
3. Layer the lining, right side down, then the batting, and finally the cone, right side up. Pin the three layers together.
4. Create the waffle look of the cone by stitching the three layers with a grid pattern. I used 2 ½” squares at an angle. (A walking foot on your sewing machine will keep the layers from shifting. Alternatively, use extra pins or hand baste the layers together with large stitches that you remove after machine sewing.)


5. Fold the cone in half, right sides together, so that the two straight sides match. Sew the straight sides together with ½” seam allowance, leaving a 4” opening in the center of the seam for turning. Taper the seam allowance at the point of the cone and turn right side out.

6. Print two Ice Cream Part 1 and two Ice Cream Part 2 patterns. Cut them out and tape together according to the Ice Cream Assembly Diagram on the pattern sheets. Using the ice cream pattern, cut six from ice cream fabric.
7. Place two ice cream pieces right sides together and sew along one curved edge. Add a third piece to the unit, right sides together, and sew along the curved side. Continue adding the ice cream pieces until all six pieces are used. Sew the first piece and last piece together along their remaining side. All of the points should meet together. NOTE: Since I used a plush fabric that sheds, I used a serger to sew the pieces together and also serged the straight edges of the pieces. If you have a fabric that sheds, sew each seam with a straight stitch and then zig zag stitch each seam.

8. Cut the brown felt into random wonky squares to resemble chocolate chips.
9. Using the perle cotton, sew the chips to the ice cream. Make one stitch in the center of each chip and tie the ends on the inside of the ice cream.


10. With right sides together, pin the cone and ice cream together so the raw edges match. The cone is already right side out so put the cone inside the ice cream so the right sides are together and the raw edges are matching. Sew around the raw edges with a ½” seam allowance. Turn the ice cream cone right side out through the opening in the cone.
11. Stuff the ice cream cone and sew the opening closed by hand.
12. Now make the cherry. Using the pattern, cut one cherry from fabric.
13. To make the stem, knot the end of the heavy thread. Bring the thread up through the center of the circle from the back to the front. Make one overhand knot in the thread close to the fabric and one overhand knot about 2” up on the thread. Trim the thread ¼” from the knot.
14. Make a running stitch around the edge of the circle.

15. Pull the thread to gather the circle in (photo below), then stuff the circle before you pull the thread tight.

16. Hand sew the cherry to the top of the ice cream.


Thank you for joining us for Sew a Softie Day!
