Sew a Softie - Piece of Paper Quilt
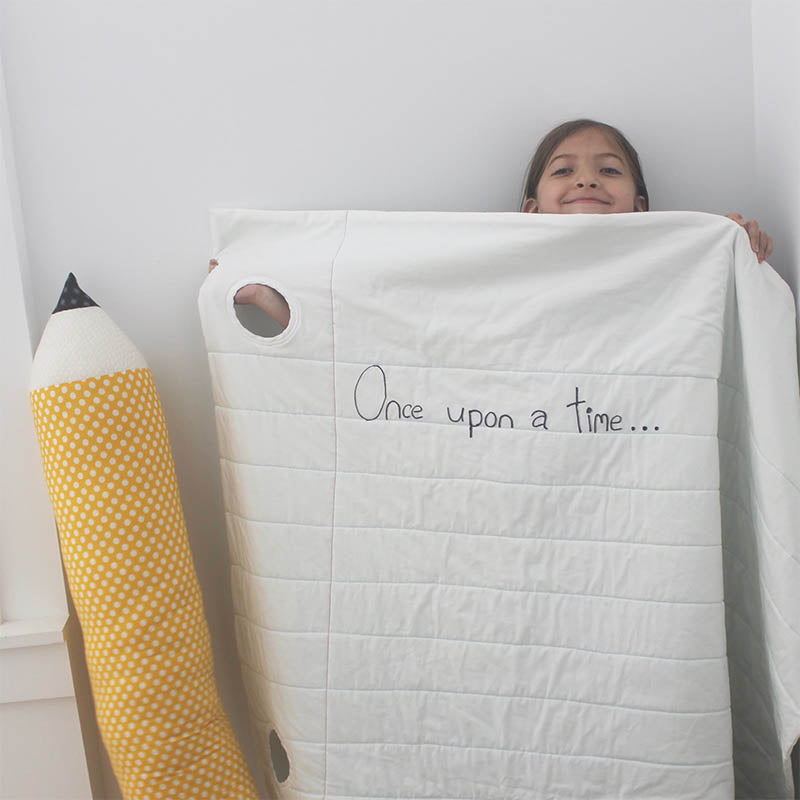


Welcome to Part 2 of my Sew a Softie project! If you haven't seen Part 1, the Giant Pencil Pillow, you can find it here. Why a 2 part project? Because what goes better with a Giant Pencil Pillow than a Piece of Paper Quilt! Folks, I know this may not be considered a softie, but I couldn't resist. I honestly tried, but this pair brought such joy and giddiness into my heart that it would not be denied. So here we go!
The finished quilt is about 52" x 67"
You will need:
2 yards of 108" wide white fabric (I used Kona)
53" x 68" piece of batting
White thread
Blue thread
Red or dark pink thread
1 yard of white extra wide double fold bias tape for binding the holes (optional)
Safety pins
Marking tool (I like the Hera marker which makes an indent in the fabric)
Gridded ruler
Sewing machine
Walking foot for your sewing machine (optional)
Compass (optional)
Fabric marker (optional)
Cut and Sew the Fabric:
Cut 2 - 53" x 67" rectangles from white fabric.
Place the 2 white rectangles on top of each other, matching the edges. Place the batting rectangle on top of the white fabric, matching the edges. Smooth all the layers. Pin the 3 layers together. Sew all around the outside of the rectangle with a 1/2" seam allowance, leaving a 12" gap on one side.

Trim the corners.

Turn the quilt right side out so that the batting is in between the two layers of fabric.
Smooth out the quilt and pin the layers together with safety pins, about every 6-8".
Turn under the edges of the opening and sew the opening closed by hand or using the sewing machine to top stitch close to the opening.
Quilt the Quilt:
Mark the lines. Mark a horizontal line 9" from the top of the quilt. Continue marking lines down the quilt at 3" intervals. There will be approximately 18 lines. Mark 1 vertical line 8" from the left edge of the quilt.


Now quilt the lines. A walking foot for your sewing machine will help keep the layers from shifting. Use blue thread for the horizontal lines and use red thread for the vertical line.


Optional:
To make loose leaf holes, use a compass to draw 3 holes, 3" diameter each. Place one hole in the middle of the left side. Place the other holes closer to the upper and lower left hand corners. Cut out the holes.


Bind the holes with bias tape. Slide the bias tape over the raw edge of the holes to enclose the edge. Pin as you go and tuck in the end of the bias tape.

Use a wide and close zig zag stitch and sew around the outside edge of the bias tape.

For extra fun, have your kid use a fabric marker to write on the stitched lines.