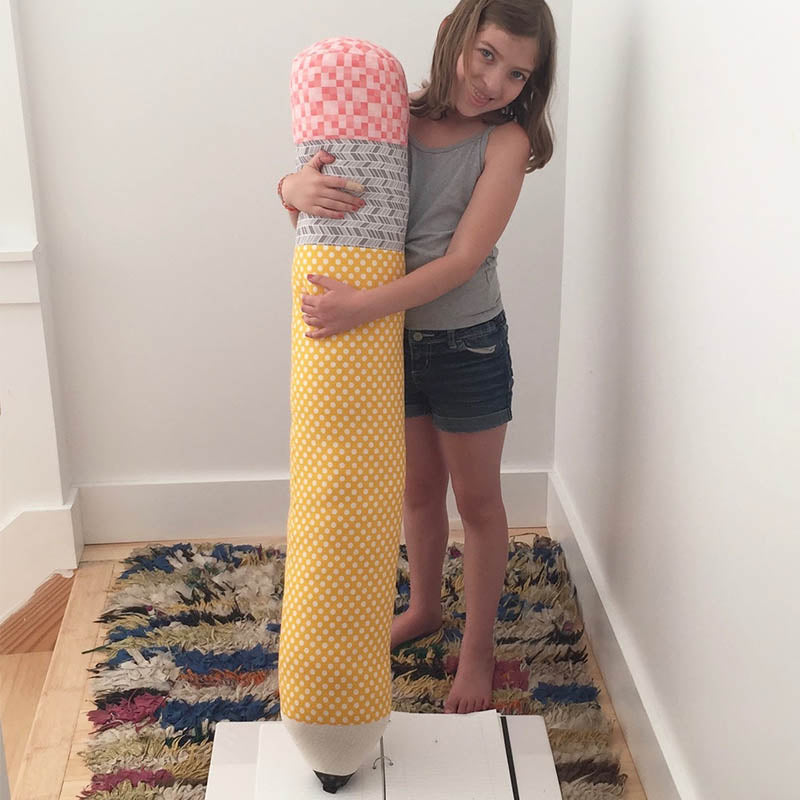
Sew a Softie - Giant Pencil Pillow
 It is Sew A Softie time again! I am so happy to be back as part of this year's tutorial hop. Last year, in honor of my love of Claes Oldenberg, I designed a Giant Ice Cream Cone. You can see that post here. This year, I have decided to continue the theme of oversized everyday objects. And just for fun, this is a 2 part project. This week is the Giant Pencil Pillow! Next week there will be a coordinating project that makes a super cute set. You can find out more about Sew a Softie here. Be sure to check out what all the other contributors are up to! You can find a list of all of the contributors for this year here.
The Giant Pencil Pillow is a quick, beginning project that includes some simple geometry as well as a good introduction in creating 3-dimensional objects from 2-dimensional pieces. My favorite 9 year old and I had lots of fun making this together. So let's get going!
You will need:
3/4 yard yellow fabric
1/4 yard gray fabric
3/8 yard pink fabric
8" x 15" piece of off white fabric
3" x 6" piece of black fabric
sewing machine
hand sewing needle
thread
fiber fill
paper and compass for pattern making
a favorite sewing companion (optional)
Note: Seam allowances are 1/4"
Draw the Pattern:
First, make the patterns for the eraser end, the wood, and the pencil point. For the eraser end, use a compass to draw a circle with a 3 3/4" radius on the paper. Cut out the circle.

For the pencil point, draw a line parallel to the edge of the paper, 1/4" in from the edge. Place the point of the compass on the line and draw a half circle with a 2 1/2" radius. Cut out the half circle, cutting past the line on both sides to the edge of the paper. The extra 1/4" makes the seam allowance.

For the wood, draw a line parallel to the edge of the paper, 1/4" in from the edge. Place the point of the compass on the line and draw a half circle with a 7 1/4" radius. Cut out the half circle, cutting past the line on both sides to the edge of the paper. The extra 1/4" makes the seam allowance. (If your compass will not open wide enough for 7 1/4", you can use a thumbtack and a piece of string.)


Cut the Fabric:
Cut the yellow fabric into a 28 1/2" x 22 1/2" rectangle.
Cut the gray fabric into a 6 1/2" x 22 1/2" rectangle.
Cut the pink fabric into a 5 1/2" x 22 1/2" rectangle AND one piece from the eraser end pattern.
Cut the off white fabric using the wood pattern.
Cut the black fabric using the pencil point pattern.

Sew the Pencil:
Time to sew! With right sides together, match one long side of the gray rectangle with one long side of the pink rectangle. Sew together.
With right sides together, match the remaining long side of the gray rectangle with one short side of the yellow rectangle. Sew together.

Place the pencil point piece, right side up, on top of the wood piece, right side up, lining up the points. Sew the point to the wood using a zig zag stitch.


With right sides together, pin the curved edge of the wood piece to the remaining short side of the yellow rectangle. Be careful not to stretch the curve. Sew together.


With right sides together, fold the pencil in half lengthwise. Match the seams and pin. Sew the pencil together leaving the short end open (the end of the eraser) and leaving a 5" gap within the yellow part of the pencil for turning and stuffing.

Now the tricky part! With right sides together, pin the eraser end to the eraser, matching the raw edges. Sew together.

Finish the Pencil:
Turn the pencil right sides out through the opening in the side. Stuff the pencil using your preferred fiberfill. Sew the opening closed using the small whipstitch or a ladder stitch.


Tune in next week for the companion project!