Sew a Softie - Iris Fairy Doll
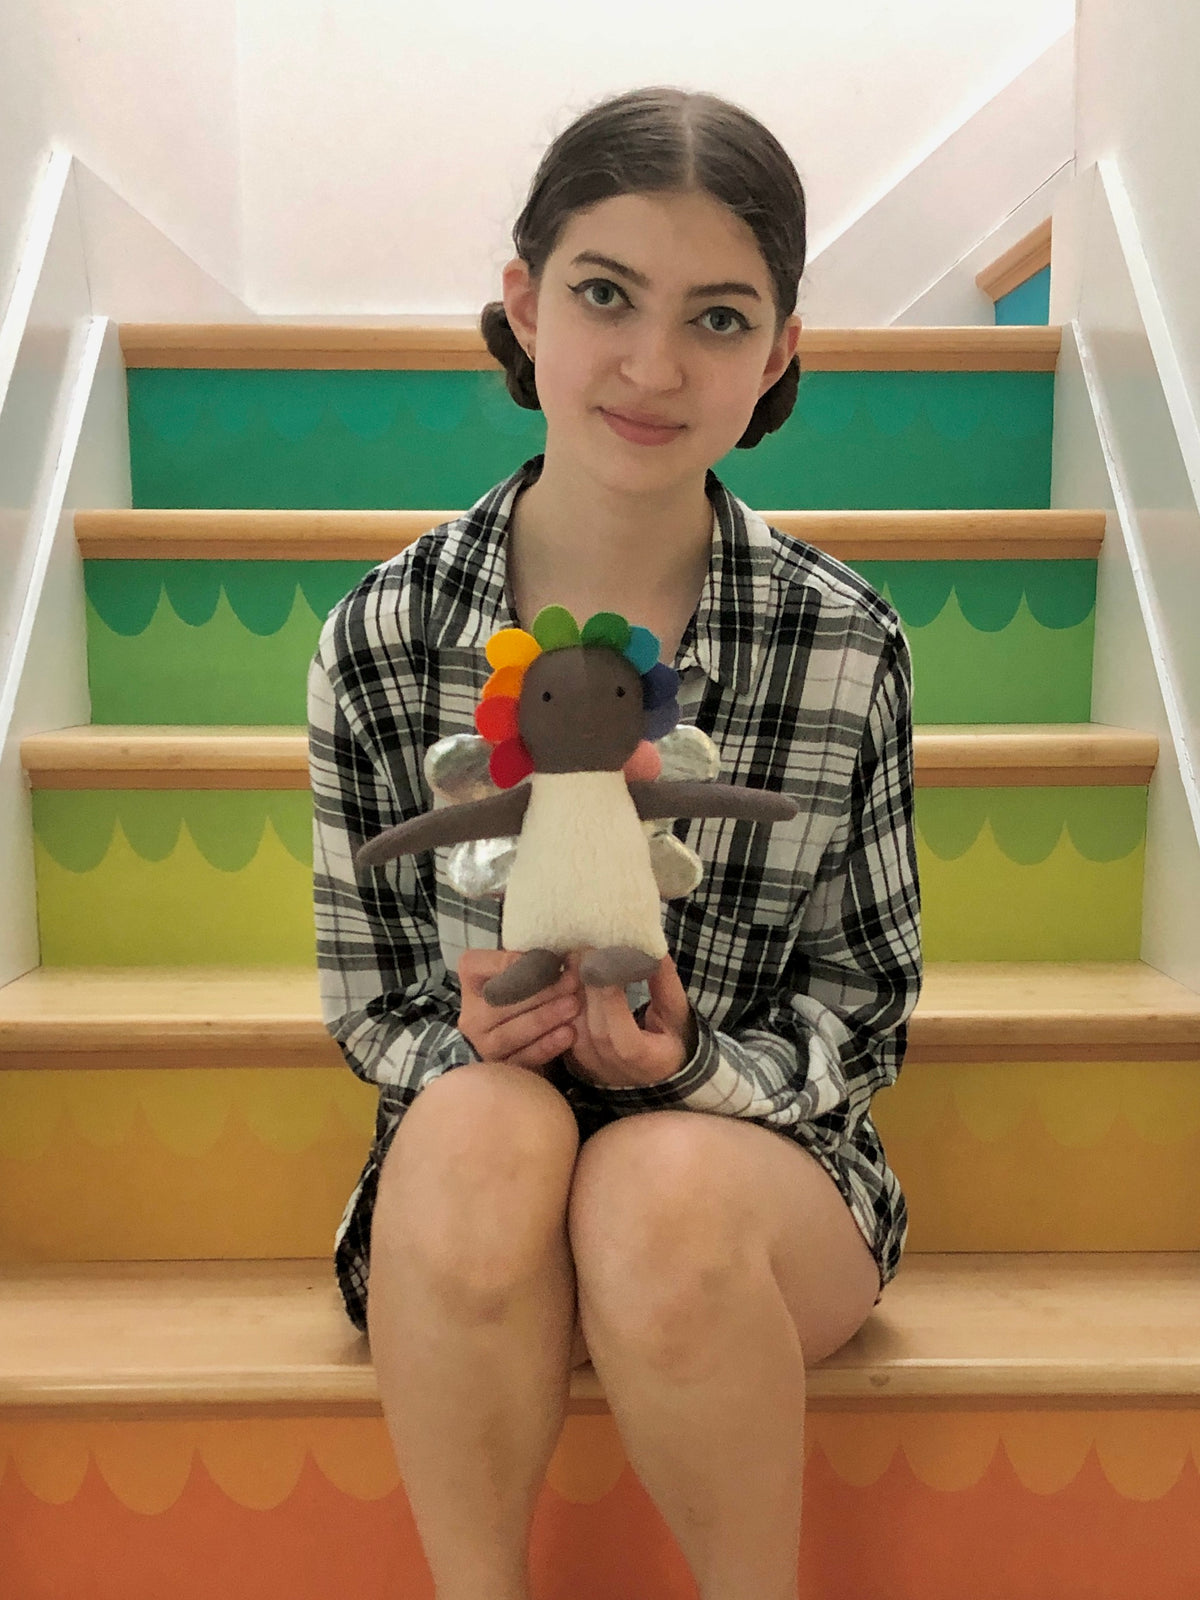
It’s Sew a Softie time of year and, once again, I’m joining the global Sew a Softie tutorial hop organized by Trixi @sewasoftie! This year’s theme is MAGIC! I decided to revisit the lovely Luna and Sol pattern from back a bit and make a new version as Iris, a magical fairy. You can find the original Luna and Sol post here. For Iris, I made her a bit smaller (she is a fairy after all), made rainbow hair, and gave her silver wings. Magic! My intrepid model, Dasi, is now 14, but she still humored me by giving Iris her name, and posing with her. Special guest appearance below by Macaroni the super mutt!

You will need:
- Templates that you can find HERE
- Wool fabric or other fabric for the body, head, arms, legs, and hair- I used felted wool fabric for the head, arms, legs, and hair. Whatever you choose for the hair, make sure it doesn't fray, since the hair is left as a single layer. For the body, I had a scrap of leftover knit cotton fleece that made a lovely cloud-like body. Experiment with whatever you can find!
- Fabric for the wings-I used some silver fabric that I had left from some long ago project.
- 1” x 3” scrap of cotton fabric such as muslin for the nose facing
- Thin batting for the wings
- Embroidery floss for the face
- Fiber Fill
- Basic sewing tools
- Tube turner (optional)
Notes:
Seam allowance is ¼” unless otherwise noted.

Here we go:
1. Using the templates that you can find HERE, and the fabrics you have chosen, cut:
• 2 body pieces
• 2 head pieces
• 4 legs
• 4 arms
• 10 hair scallops
• 2 wings from fabric and 1 from batting
*If you are using fabric with a right side and wrong side, make sure you have mirror images of pieces.
2. Embroider the eyes and the mouth on the face. I used a stem stitch but you can use any stitch you like.
3. To make the trapunto nose, place the cotton scrap on the back of the head front, directly behind the nose. Stitch the outline of the nose on the front of the face. Thread a large eye needle with 6 strands of embroidery floss. Slide the needle into the channel at the top of the head between the nose and the nose facing. Bring the needle out of the nose facing at the end of the nose. Go back into the muslin and up through the nose channel, out the top of the head. Repeat until the nose is stuffed with the strands of floss. You can also just stitch the nose and eliminate the trapunto if you prefer.


6. Matching the raw edges of the head curve and straight sides of the hair pieces, pin the hair scallops to the front head. Sew around the edge using a scant ¼” seam allowance.


8. With right sides together, pin the body/head back to the body/head front, keeping all appendages tucked inside. Sew completely around the head and body. You may need to shift around the arms and legs inside as you go.

9. Clip the curves and corners. Turn the doll right side out through the opening in the back seam between the head and body. Stuff the doll and sew the opening closed.
10. Sew the wings. Layer the batting, then one wing piece right side up, and then one wing piece right side down. Sew around the entire outside. Clip the curves and corners. Being careful to only cut the top layer, cut a 2” slit vertically through the top wing. Turn the wings right side out through the slit. Whip stitch the opening closed.

11. Sew the wings to the back of the fairy with a few stitches at the center top and bottom.